

Method Statement (UK Construction) + (DOCX) Template
Introduction
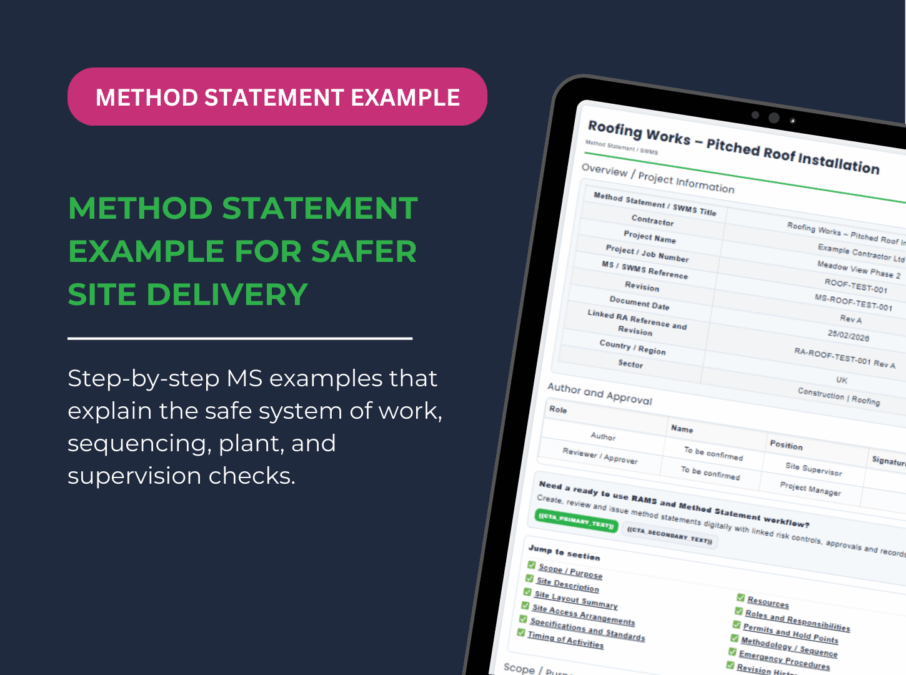
If you are searching for a method statement template (DOCX), what you usually want is not “better wording” but a complete, review-ready structure that covers every field a supervisor, H&S reviewer, and site manager expect to see. This article walks through the exact document structure and field groups using dummy data, so you can see where each item belongs and how the sections connect.
If you want the wider context, start with Method Statements in Construction Guide. This article stays focused on one thing: a complete example structure, with every field explained so you can copy the layout without missing key governance details.
A good method statement should read as a controlled document with clear ownership, site context, key controls, permits and hold points, and evidence of briefing and review. That structure aligns with HSE’s description of method statements as a logical sequence that includes control measures.
Quick Answer..
A method statement is a controlled document that explains, in a logical sequence, how a specific task will be carried out safely, including the control measures and the site constraints that shape the method. It should link to the relevant risk assessment, define permits and hold points, and keep evidence of approval, review, and workforce briefing.
What is a method statement and why it exists
A method statement is a controlled document that explains, in a logical sequence, how a specific task will be carried out safely on a particular site. It translates the risk assessment outputs into a practical plan for delivery, including how the work is set up, what controls must be in place, and what checks prove the controls are working. In other words, the risk assessment helps you decide what could go wrong and what controls are needed, while the method statement explains how the work will be done so those controls actually happen.
It exists because high-risk work often fails at the “delivery” stage, not the “paperwork” stage. People can agree hazards and controls, then still start work without confirming access, permits, exclusion zones, supervision, competence, inspection status, or emergency arrangements. A good method statement prevents that by forcing a site-specific sequence, explicit hold points, and clear ownership, so supervisors can brief the team and stop work when conditions are not met. This aligns with HSE’s framing that method statements describe the job in a logical sequence and include control measures. (hse.gov.uk)
In practice, reviewers also use the method statement as an audit trail. Your template fields (linked RA revision, approvals, revision history, review triggers, briefing records) exist to prove the document is current, authorised, communicated, and updated when conditions change.
When a method statement is required in practice on UK sites
You will see method statements required in practice whenever the work has meaningful risk, complex sequencing, multiple interfaces, or tight site constraints. Many principal contractors and clients make them a contractual requirement for specific activities, and they are routinely expected for higher-risk operations where the method, access, and control checks matter as much as the hazard list.
A method statement is typically required or expected when the task involves one or more of the following:
-
Work at height where access, edge protection, weather stops, and rescue planning must be defined and checked
-
Lifting operations, material landing areas, and exclusion zones that must be controlled and held before work proceeds
-
Temporary works constraints or scaffold dependencies where inspection status and change control are critical
-
Significant interface risk, for example multiple trades on the same plots, live traffic routes, or shared laydown areas
-
High consequence hazards, such as falling objects, plant interactions, energised systems, or fragile surfaces
-
Any activity where permits and hold points are used to prevent unsafe starts
For work at height examples in particular, the need is not just “have controls”, but “plan and organise the work so it is carried out safely”, including access arrangements and changing conditions like weather. (hse.gov.uk)
A simple decision rule that works on most sites is:
-
If you can start the task safely using only a generic rule set, the method statement can be short and standardised.
-
If safe start depends on checks, interfaces, permits, inspections, or changing conditions, you need a task and site-specific method statement with explicit hold points and briefing evidence.

The method statement is a system, not a narrative
Our example shows what reviewers actually check first: control, ownership, and traceability. This is consistent with HSE’s framing that a method statement describes a job in a logical sequence and includes control measures.
In practice, the “system” is the link between sections. The project background links to the risk assessment. The scope links to interfaces and restrictions. The key controls link to hold points and the step-by-step method. The review triggers link to revision history. The briefing record links to evidence you can produce in an audit.
To keep it structure-first, treat each section as answering one question:
-
What job is this document controlling
-
Who owns it and who approved it
-
What is the site context and what could change
-
What are the critical controls and where do we stop if they are missing
-
What evidence proves it was briefed and reviewed
1) Overview and project information fields
The “Overview / Project Information” block is where you prove this is a live, controlled document for a specific job. Reviewers look for identity, revision, and traceability before they read the method.
Your template’s required fields in this block are all defensible because they each reduce ambiguity:
-
Title, contractor, project, job number, MS reference, revision, issue date: establishes identity and current version.
-
Linked RA and revision: proves the method is aligned to current risk controls, not an old assessment.
-
Site address or location: stops “copy across sites” failures.
-
Client, principal contractor, principal designer: clarifies dutyholder context without turning the MS into a legal essay.
-
Distribution: shows who must receive it and who must be briefed.
When writing this section, the key decision factor is whether the MS can be mistaken for another job. If the answer is yes, add more specificity in the location and scope fields, not more generic prose.
If you want context on how risk assessment outputs should feed into a method statement, use the wider combined governance guide. Risk Assessments Statements Guide
2) Author and approval fields, plus revision control
The “Author and Approval” table is a control, not a formality. It answers who created the method, who reviewed it for safety, and who approved it for delivery on that site. CITB’s method statement guidance explicitly frames a method statement as a communication tool that reflects risk assessment findings, which makes sign-off and review a practical requirement, not a box-tick.
Your table structure is strong because it separates roles:
-
Author: usually the person who understands the task sequence and site constraints.
-
Reviewer: typically checks adequacy of controls, interfaces, and whether the MS reflects the RA.
-
Approver: confirms it is current, workable, and aligned with site rules and permits.
Link this approvals table to two later sections:
-
Review and change management: who signs planned reviews and triggered reviews
-
Revision history: what changed between revisions and who approved the change
A common operational risk is “silent revision drift”, where the header shows Rev C but the method text has not been updated, or the linked RA is still Rev A. Your header field “Linked RA and Revision” is what prevents that.
3) Scope, interfaces, restrictions, standards, and timing
This is where most method statements either become genuinely site-ready or collapse into generic text. The trade-off is simple: the more specific you are about location, interfaces, and restrictions, the less you need to over-explain.
Your template correctly breaks this into usable fields:
-
Location, plots or zones: define where the method applies.
-
Working hours: helps interface planning and supervision.
-
Start and end dates, duration: useful when conditions could change over time, for example seasons and weather exposure.
-
Scope of works: define inclusions in one paragraph, not a list of everything the company can do.
-
Interfaces: other trades, deliveries, pedestrian routes, scaffold alterations, crane lifts.
-
Restrictions: weather dependency, permit conditions, access rules.
Then you reinforce it with narrative fields:
-
Site description: short description that matches the site reality.
-
Site layout summary and access arrangements: where welfare is, where laydown is, delivery booking rules, visitor controls.
Finally, you anchor it to references:
-
Applicable specifications and standards and Reference documents: drawings, manufacturer instructions, TMP, lift plans, temporary works checks.
This section aligns well with work at height planning principles, where the requirement is to assess risk and then organise and plan the work so it is carried out safely.
4) Key controls, resources, competence, and responsibilities
Your “Key Controls Summary” is one of the most valuable structural sections because it pulls critical controls out of the method text so they can be briefed and checked. It is also where reviewers quickly see whether you have identified what must not fail.
A strong key controls table usually does three things:
-
Groups controls by hazard theme, like work at height, falling objects, manual handling, traffic
-
Uses control language that can be checked, like “tagged scaffold” rather than “be careful”
-
Matches the controls that appear later in the method sequence and hold points
Then your template backs it up with delivery capacity:
-
Resources: people, plant, materials, PPE.
-
Competence and training: working at height awareness, manual handling, tool competency, banksman where required, site induction and MS briefing.
Your “Roles and Responsibilities” table is the ownership layer. The real-world constraint here is supervision bandwidth on a busy multi-plot site. If the supervisor is responsible for permits, briefings, and interface control, the method needs to make those responsibilities obvious and limited, not scattered.
One practical addition you already implied is stop-work authority. In your responsibilities section, make clear that operatives can stop work if hold points are not satisfied, then the supervisor confirms whether work resumes.
5) Permits, hold points, and the methodology sequence
This is the part that makes it “site-operable”.
Permits
Your permits table fields are exactly what supervisors need to run the day:
-
Permit type
-
Permit reference
-
Issuing authority
-
Validity
-
Status
The key decision factor is whether a permit is required to start work, required only for certain methods, or conditionally required if a trigger occurs. Your “Hot works permit (if used)” is a good example of conditional permitting.
Hold points
Hold points are where the method stops until a condition is true. Your example uses hold points well because each one prevents a predictable failure, such as going onto a roof before confirming scaffold tags and weather.
For work at height tasks, planning and organisation requirements are explicit in HSE guidance, and hold points are one practical way to demonstrate that planning in a deliverable sequence.
Methodology and sequence of activities
Your seven-step structure covers the expected lifecycle:
-
Pre-start, induction, mobilisation
-
Deliveries, unloading, storage
-
Access set-up and controlled entry
-
Inspection and setting out
-
Material transfer and safe storage
-
Installation works
-
Completion, housekeeping, demobilisation
To keep it “fields-first”, each step should do three things:
-
State the action
-
State the controls that apply in that step
-
State the evidence or check that proves it was done, even if that evidence is just “supervisor confirmation” recorded in the briefing notes
Plant and equipment inspection records
Your inspection records table is the proof layer for access and lifting equipment. It prevents the common assumption that “scaffold exists, therefore scaffold is safe”.
The fields you included are correct:
-
Item
-
Inspection type
-
Frequency
-
Evidence reference
-
Status
In the example, the evidence reference is “To be confirmed”, which is fine for dummy data, but the structure is what matters.
6) Environment, COSHH, emergencies, review, revisions, and briefing evidence
These sections are often omitted from templates, which is why including them is a good structural signal.
Environmental controls and COSHH
Your template handles the trade-off well:
-
Environmental controls: include the essentials that affect this task, like waste segregation and fuel storage.
-
COSHH: include only if hazardous substances are used.
That “include only if used” rule keeps the MS short and avoids irrelevant content.
Emergency arrangements
Your emergency table includes what site teams actually need in an emergency:
-
Emergency services number
-
Site emergency contact
-
Assembly point
-
Height rescue plan reference
-
Nearest hospital and access route
-
First aid provision
The operational risk here is that people assume “work at height rescue exists” without referencing it. Your “Height rescue plan” field forces the plan reference into the document.
Review and change management
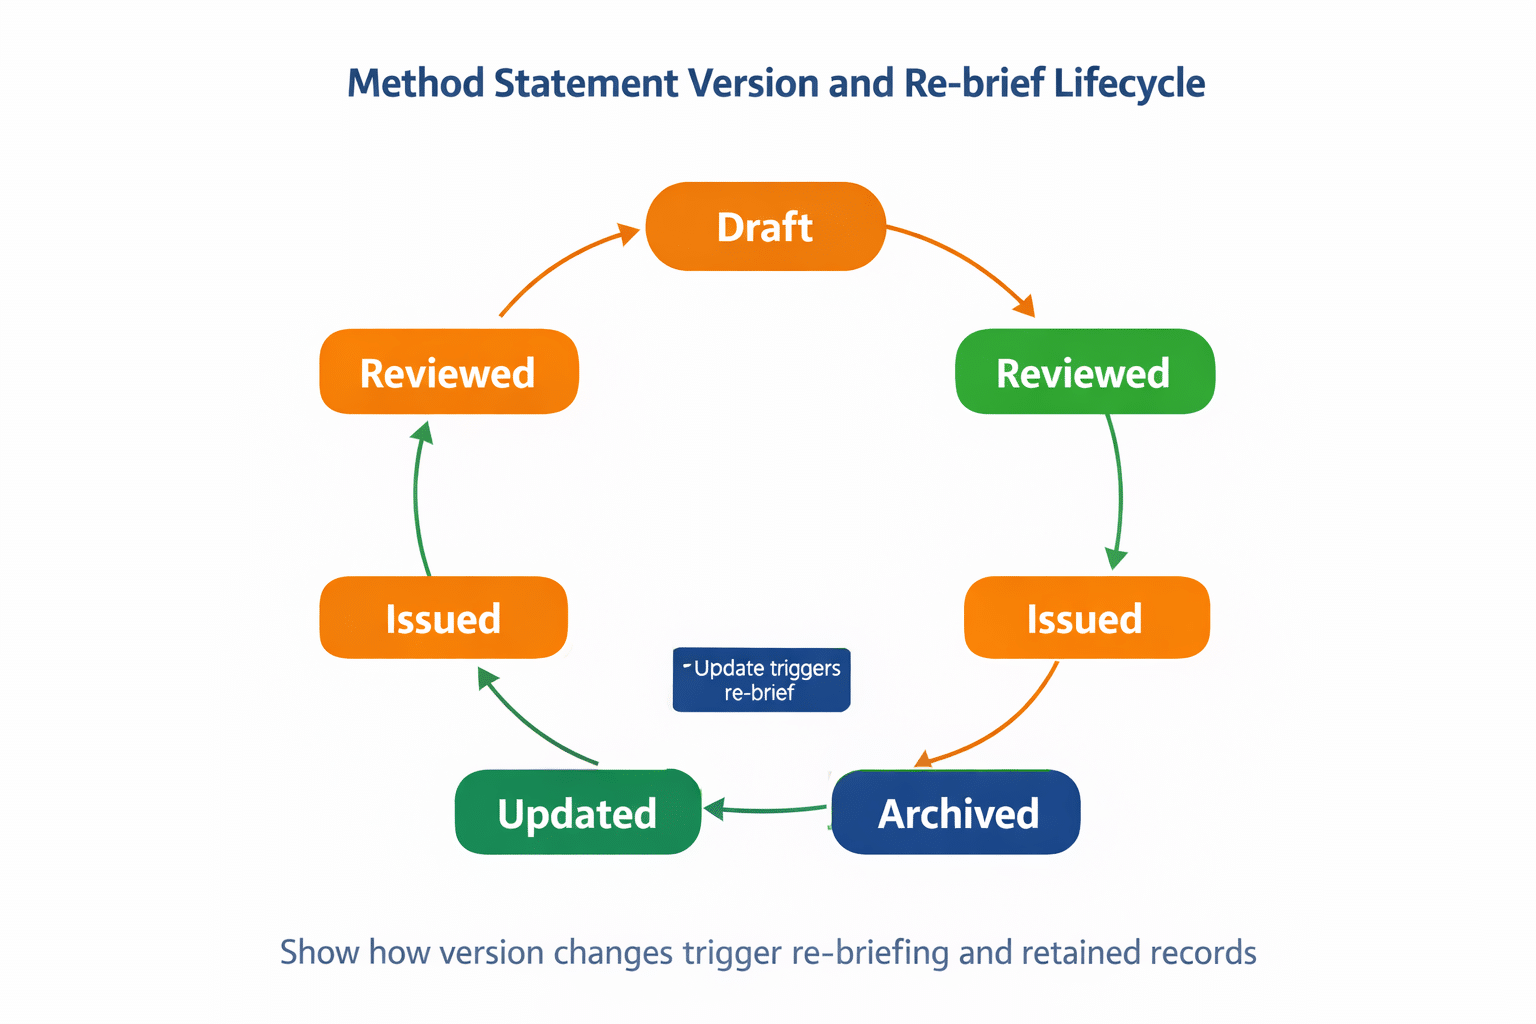
This is where you lock the method to reality. Your review triggers are exactly what should force a re-brief:
-
scope or location change
-
incident or near miss
-
new equipment or interfaces
-
adverse weather impacting work at height
Then you add a planned review interval and sign-off. That makes it auditable.
Revision history
Your revision table structure is correct:
-
revision
-
date
-
change summary
-
changed by
-
approved by
The discipline is in the “change summary”. Keep it specific, like “Added methodology hold points”, not “updated”.
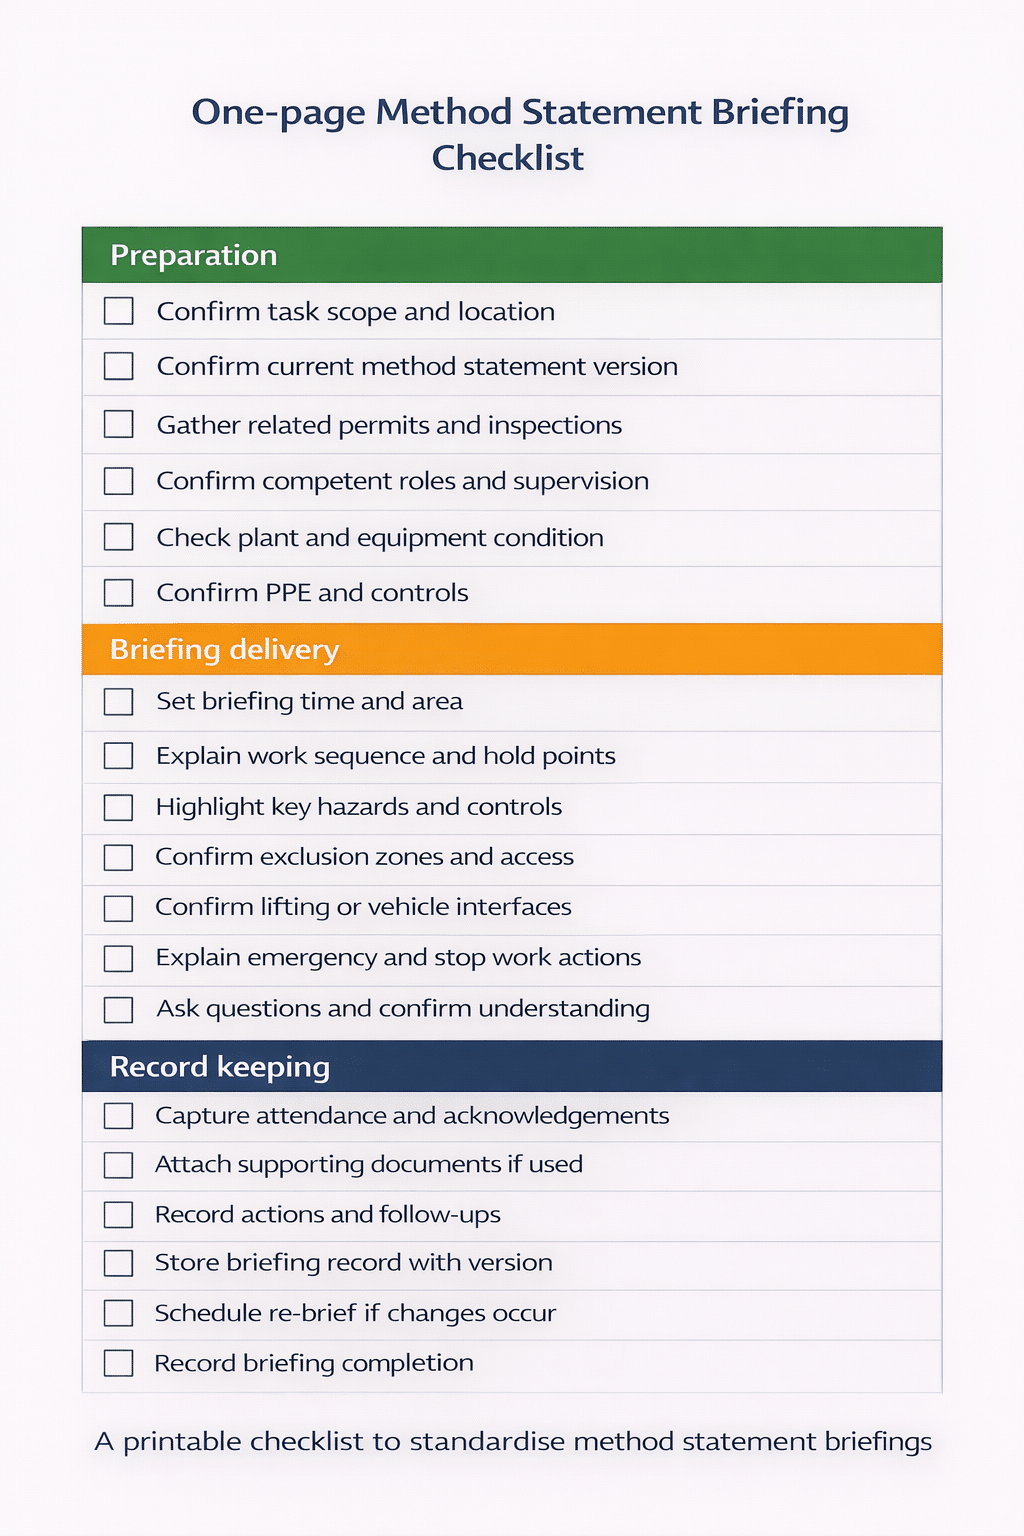
Briefing and acknowledgement
This is your final proof layer, and it should never be treated as an optional add-on.
Your table captures:
-
name, company, signature, date
-
RA briefed yes or no
-
MS briefed yes or no
If you are capturing briefing evidence digitally, this is the point to connect the method statement document to briefing workflows and sign-off records. Safety Briefing App
| Do's | Don'ts |
|---|---|
| Link the MS to the correct RA revision | Leave the linked RA blank |
| Define plots, zones, and interfaces | Use generic site-wide scope |
| Use hold points to stop unsafe starts | Rely on "be careful" wording |
| Reference permits and their validity | Assume permits are implied |
| Record inspection evidence references | Assume equipment is in date |
| Capture briefing sign-off evidence | Skip who was briefed |
Common Method Statement Mistakes That Cause Problems on Site
Many method statements look complete on paper but fail under site conditions. The problem is rarely formatting. It is usually a gap between what the document says and what the site is actually doing that day. When supervisors are under time pressure, vague wording and missing checks translate directly into unsafe starts, rework, or stop-work instructions from the principal contractor.
The most common failures happen where ownership, interfaces, and change control are unclear. A method statement that reads well but cannot be used as a practical control document will create confusion rather than reduce risk.
Below are the mistakes that most often cause problems in practice, and why they matter.
1) Generic scope that does not match the actual work area
A method statement that says “roofing works across site” without defining plots, zones, scaffold elevations, or delivery interfaces is too wide to control anything.
On a multi-plot development, the difference between Plots 101–110 and “site wide” is significant. Scaffold arrangements, pedestrian routes, delivery access, and interface trades may all differ by zone. When the scope is vague, operatives start work in areas that were not properly planned.
Fix: Define location, boundaries, and interfaces clearly, then reflect them in the method sequence and hold points.
2) Controls written as statements, not checks
Phrases like “ensure safe access” or “maintain good housekeeping” are intentions, not controls. They cannot be measured, checked, or held.
On site, the question is always: what must be in place before we proceed? If the answer is not explicit, work will continue even when conditions are not compliant.
Fix: Convert control statements into verifiable conditions. For example:
-
“Tagged scaffold in date”
-
“Exclusion zone established and signed”
-
“Weather conditions confirmed suitable before roof access”
Then use hold points to stop work if those conditions are not met.
3) No clear link to the current risk assessment revision
A method statement that does not reference the correct risk assessment revision creates version conflict. If the RA is updated after an incident or design change, but the MS still links to an earlier revision, the site team may be working to outdated controls.
This is a common audit finding and can undermine the credibility of the entire document set.
Fix: Include a “Linked RA and Revision” field in the header and update it every time the RA changes. Align review and revision dates across both documents.
4) Missing or poorly defined hold points
Hold points are where unsafe work is most often prevented. Without them, teams drift into starting before access is complete, before permits are issued, or before weather conditions are reassessed.
For example, beginning roof installation before confirming scaffold tags and edge protection is a predictable failure in work at height scenarios.
Fix: Define hold points at logical risk transitions, such as:
-
Before first access to height
-
Before lifting or landing materials
-
Before removing controls
-
After scope or weather changes
Make it clear who confirms the hold point and how it is recorded.
5) Interfaces not addressed
On busy sites, most risk arises from interaction rather than the task itself. Deliveries crossing pedestrian routes, scaffold changes by another trade, crane lifts over work areas, or shared laydown zones all introduce interface risk.
A method statement that ignores these interfaces may technically describe the task but fail in the real environment.
Fix: List known interfaces in the scope section and reflect them in the method steps. If deliveries require a banksman, or if scaffold changes must be communicated before roof access, state it clearly.
6) No ownership or stop-work clarity
If roles and responsibilities are vague, supervision becomes diluted. Operatives may assume the supervisor has checked something, while the supervisor assumes the principal contractor has done so.
Equally important is stop-work authority. If operatives are not empowered to stop when hold points are not satisfied, unsafe starts will continue.
Fix: Define who plans, who checks, who approves, and who can stop work. Keep it practical and specific to the task.
7) Weak review and change management
Conditions change. Weather shifts, new trades arrive, materials change, or incidents occur. If the method statement does not define review triggers and a clear revision process, it becomes static while the site evolves.
A document that is technically “Rev C” but no longer reflects current conditions is a liability.
Fix: Include:
-
Clear review triggers
-
Planned review interval
-
A disciplined revision history table
-
Re-briefing when changes occur
8) No briefing evidence
A method statement that is never briefed might as well not exist. Audits and investigations often focus on whether the workforce understood the controls.
If there is no briefing record, no signatures, and no confirmation that the linked risk assessment was discussed, you cannot prove communication.
Fix: Include a structured briefing and acknowledgement table capturing:
-
Name
-
Company
-
Signature
-
Date
-
RA briefed yes or no
-
MS briefed yes or no
If briefings are managed digitally, the document should clearly link to that evidence trail.
Download Your Free Method Statement Template
Build Clear Method Steps Faster
Use a practical, site-friendly template to document sequence, roles, plant, and controls for clear briefings and easier site delivery.
Method Statement example
The example below shows a complete worked Method Statement layout, written in a way you can brief on site. Use it as a reference for structure, tone, and the level of detail that is typically expected for a site-ready document.
Download Your Free Method Statement Template
Build Clear Method Steps Faster
Use a practical, site-friendly template to document sequence, roles, plant, and controls for clear briefings and easier site delivery.


